
Getting Started with CI/CD and Pipelines in Azure DevOps
Why Software Deployment Is Hard Without Pipelines and How Azure DevOps Makes It Easy

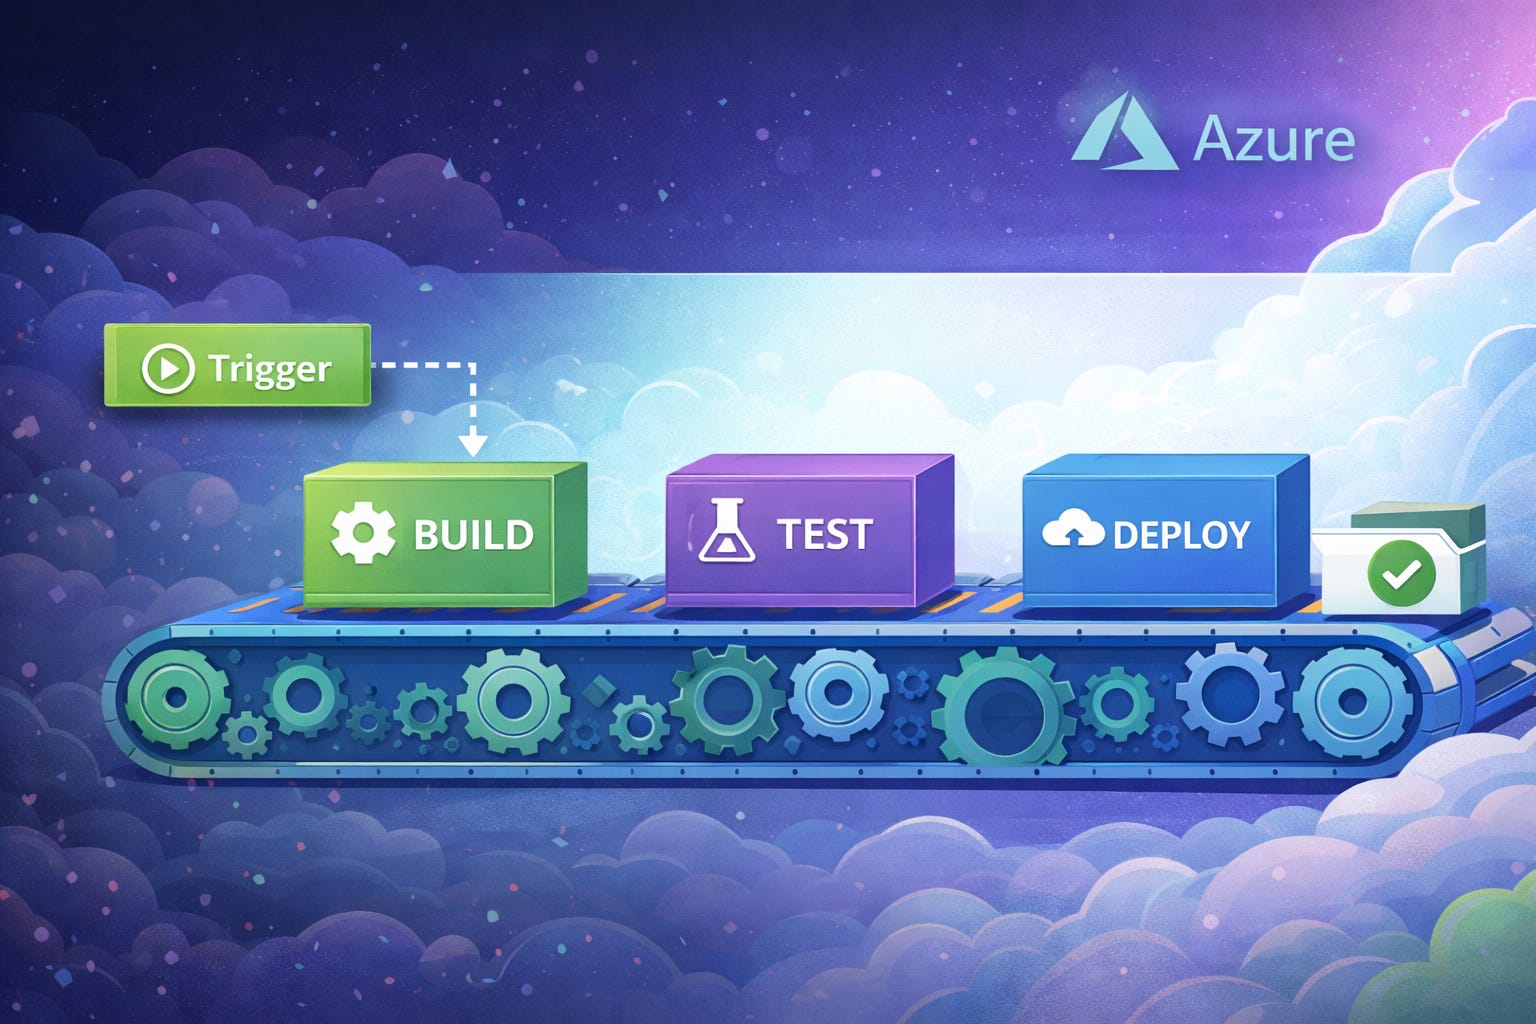
In modern software development, simply writing code is no longer enough. To deliver a reliable product, code must be continuously built, tested, and deployed to various environments with minimal manual intervention. Traditionally, this process was performed manually: developers had to compile the code, run tests, prepare the necessary files, and move them to testing and production environments. Such manual workflows are time-consuming, prone to repeated errors, and make managing team coordination and dependencies challenging.
Azure DevOps Pipelines, a cloud-based service, automates this entire process. It allows teams to manage the build, test, and deployment of code in a transparent and repeatable way. With a pipeline in place, the journey of code from the source repository to the running environment becomes visible and controllable, enabling teams to release changes with greater confidence.
CI/CD plays a central role in this process. New code is continuously integrated with the main branch and tested, and the outputs are deployed to different environments. Pipelines can be defined in various ways, and one of the most popular approaches is YAML, which allows the pipeline configuration to be stored as a text file alongside the project’s code.
It’s worth noting that Azure’s capabilities go far beyond just build and deployment. The platform also offers project management, source control, boards, security features, and more. In this article, we focus specifically on the Azure DevOps features that support software deployment and execution, giving developers a foundational, hands-on understanding of how code moves from development to a live environment.
CI/CD in Azure DevOps Pipelines
In the DevOps approach—and particularly within Azure DevOps Pipelines—CI/CD refers to a set of automated processes aimed at improving software quality and reducing deployment risks.
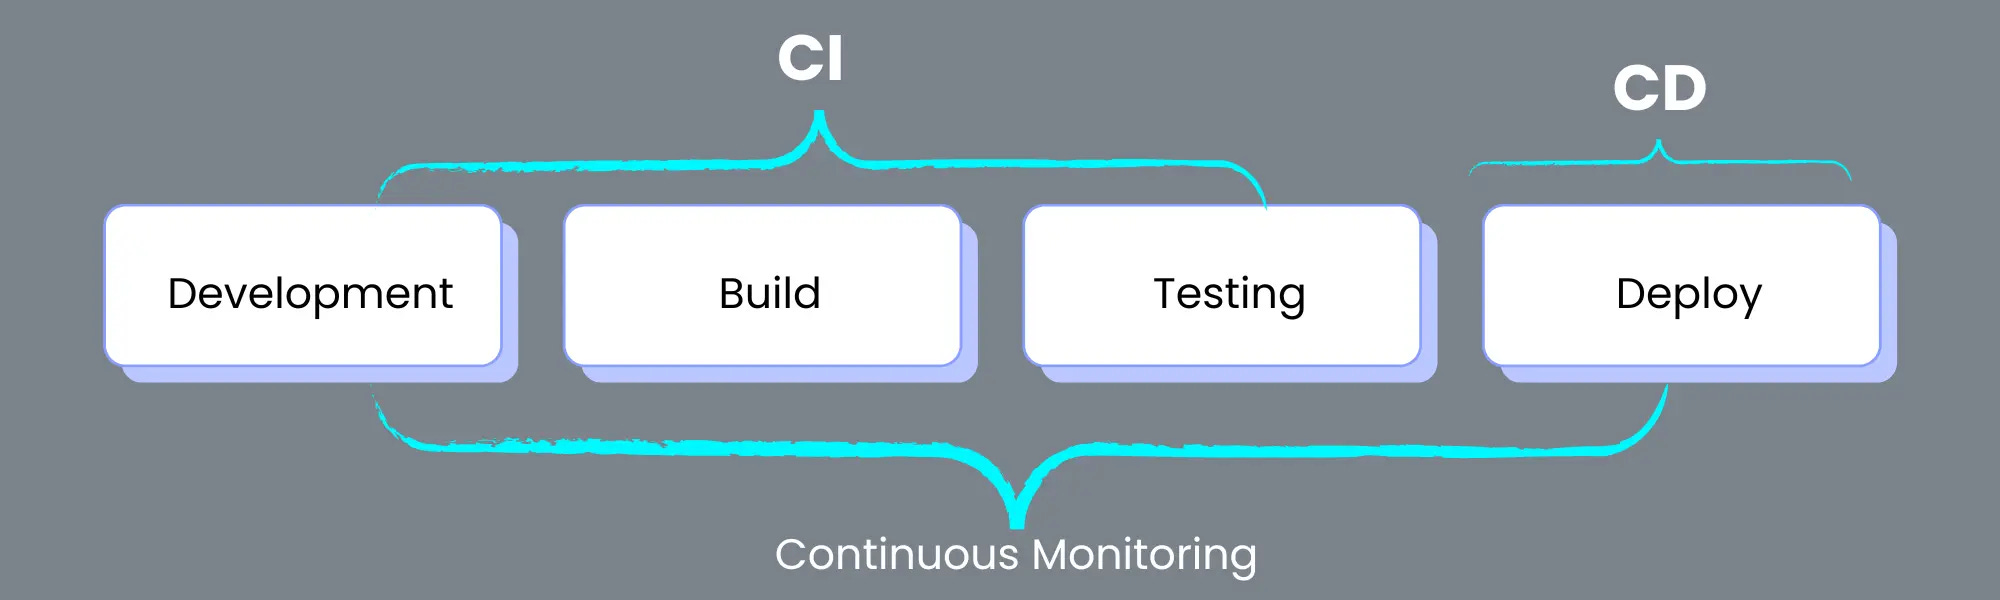
Continuous Integration (CI) is the process where developers frequently merge their code changes into a shared repository. Every time changes are pushed or a pull request is created, Azure DevOps Pipelines automatically starts the build and runs the necessary tests. This approach ensures integration issues are identified early, helping maintain code quality over time.
Following CI, Continuous Delivery (CD) comes into play. In this stage, the outputs of CI are deployed to downstream environments such as Staging or Production. Deployment can be fully automated or safeguarded with mechanisms like manual approvals, policy checks, and gates to prevent errors in sensitive environments.
The combination of CI and CD forms a cohesive pipeline where code flows continuously from development to production. The benefits include faster feedback, reduced human error, and safer software releases.
Types of Pipelines in Azure DevOps
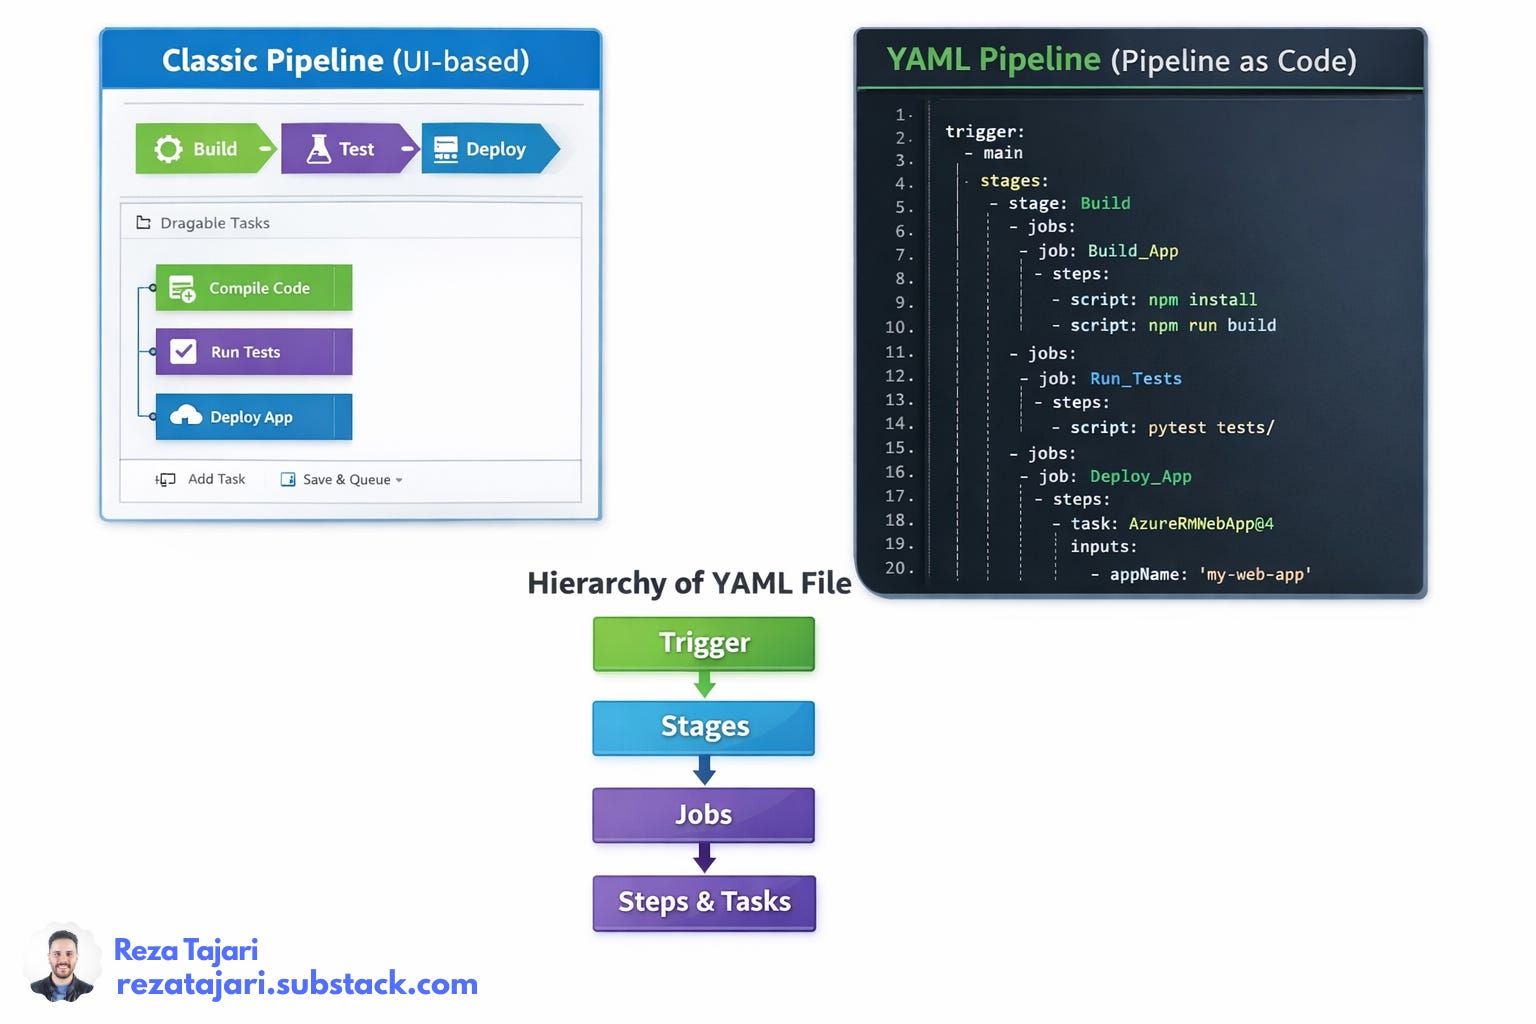
Azure DevOps provides two main approaches for defining pipelines. Both support CI/CD, but they differ in configuration, maintainability, and long-term suitability.
Classic Pipelines
Classic pipelines are created through the Azure DevOps web interface using a visual editor. Typically, processes are split into two separate pipelines:
Build Pipeline – for compiling code and running tests
Release Pipeline – for deploying software
Tasks and steps can be defined directly in the Azure DevOps interface, but pipeline configurations are not stored in the source repository, meaning full version control is not available.
Although classic pipelines are still supported, Microsoft considers them a legacy approach and recommends using YAML-based pipelines for new projects. YAML pipelines are defined as code in the repository, making them easier to maintain, version, and share.
YAML-Based Pipelines (Pipeline as Code)
In YAML-based pipelines, the entire CI/CD process is defined in a text file—usually named azure-pipelines.yml—stored in the source repository. This approach treats the pipeline configuration just like code: it can be version-controlled, reviewed, branched, and tracked for changes over time.
One of the key advantages of YAML is its support for multi-stage pipelines. With this setup, you can manage Build, Test, and Deploy stages within a single definition. This structure makes pipelines more flexible, easier to reuse, and simpler to maintain.
For these reasons, YAML-based pipelines are recommended for all new projects. Tools are also available to migrate from classic pipelines to YAML, allowing teams to adopt modern practices without losing their history.
Quick Comparison
Classic Pipelines use a visual, drag-and-drop interface. They may be easier for beginners to get started with but have limitations in portability, maintainability, and alignment with modern DevOps practices.
YAML Pipelines follow the “configuration as code” principle, making them more flexible, future-proof, and the preferred choice for contemporary DevOps teams.
How to Create a New Pipeline in Azure DevOps
Once you understand the concept of a pipeline and its role in CI/CD, the next step is practical implementation—seeing how these concepts are applied in real projects. Fortunately, creating a pipeline in Azure DevOps is straightforward and can often be completed in just a few minutes.
Prerequisites: Getting Ready Before You Build a Pipeline
Before starting, make sure you have the following in place:
Azure DevOps Organization and Project
You need an active Azure DevOps organization and at least one project. These can be created for free, and the Pipelines section will be available within the project.Source Code Repository
Azure Pipelines works with multiple repositories, including Azure Repos, GitHub, GitLab, Bitbucket, and even Git or SVN. The project’s code must reside in one of these repositories.Repository Access and Permissions
If you’re using an external repository, such as GitHub, Azure DevOps must have access via OAuth or a Service Connection.Pipeline Agent
Azure DevOps provides Microsoft-hosted agents by default (Windows, Linux, and macOS). For specific requirements, you can also use self-hosted agents.
Once these prerequisites are ready, you’re set to create your first pipeline. Next, you can define the Build, Test, and Deploy stages step by step. The following sections will guide you through creating your first workflow in Azure DevOps in a simple and practical way.
Step-by-Step: Creating a Pipeline in Azure DevOps
Step 1: Start the Pipeline Wizard
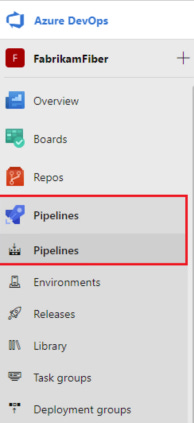
Within your Azure DevOps project, navigate to Pipelines → New Pipeline from the main menu.
At this stage, Azure DevOps will ask where your project’s code is hosted, such as Azure Repos or GitHub.
If your repository is external, you will go through the authentication process, and then you can select the repository you want to connect.
Step 2: Choose a Suitable Template
Once the repository is connected, Azure DevOps scans its contents and suggests templates based on the type of project.
For Maven projects, a Maven build template will be suggested.
For .NET projects, a template for ASP.NET Core will appear.
At this stage, you can choose a template, edit it, or even start from a completely empty pipeline. This choice will serve as the starting point for defining your pipeline.
Step 3: Review and Run the Pipeline
After selecting a template, the YAML editor opens, giving you a file named azure-pipelines.yml. This file contains the initial pipeline steps, from restoring dependencies to Build and Test.
Once you review or apply any changes, select Save and Run:
The YAML file is committed to the repository.
The first pipeline run starts automatically.
During execution, logs are displayed in real time, allowing you to monitor each step, such as restoring dependencies, building the project, and running tests.
The success or failure of this run provides immediate feedback on the pipeline’s status.
Step 4: Edit and Rerun the Pipeline
After the initial run, the pipeline becomes an integral part of your project. Any changes to the YAML file—whether through the Azure DevOps editor or locally and committed—can trigger a new pipeline run.
You can configure the pipeline to automatically run on every Push or Pull Request. Azure DevOps also keeps a history of all runs, enabling you to track, compare, and troubleshoot changes over time.
Understanding Jobs and Tasks in a Pipeline
Each pipeline is made up of smaller components, the most important being Jobs and Tasks:
Job: A collection of steps that runs on a specific agent.
Task: Individual actions executed within a job.
In a YAML pipeline, a simple structure might look like this:
jobs:
- job: BuildJob
  displayName: "Build Job"
  pool:
    vmImage: 'ubuntu-latest'
  steps:
  - script: echo "Restoring project dependencies..."
    displayName: "Restore Dependencies"
  - script: echo "Running tests..."
    displayName: "Run Tests"
In this example, one job runs on a Linux agent and performs two simple steps. In real projects, these steps would be replaced with actual commands, such as dotnet, npm, or mvn. In addition to scripts, Azure DevOps provides predefined tasks that are easy to use and follow best practices.
In classic pipelines, these concepts are implemented via the graphical interface by adding tasks. Build and Release pipelines are usually separate. In contrast, YAML pipelines can manage all stages in a multi-stage pipeline within a single file, giving more flexibility and maintainability.
Parallel Job Execution and Dependency Management
One of the key advantages of YAML pipelines is the ability to define multiple jobs within a single stage. If no specific dependencies are set, these jobs run in parallel. This makes it easy to implement scenarios such as:
Running Frontend and Backend builds simultaneously
Executing builds on multiple operating systems (Linux, Windows, macOS)
When the order of execution matters, you can define dependencies to specify which jobs or stages should run only after the successful completion of previous ones. This flexibility makes Azure DevOps Pipelines a powerful tool for managing complex CI/CD workflows.
Pro Tip: When working with pipelines, edit your YAML file gradually and incrementally. The built-in Azure DevOps editor includes a snippet library and an Insert Snippet feature, which makes adding tasks and common structures very simple. Additionally, Azure DevOps validates your YAML during save or run, catching many syntax errors before execution.
Building Pipelines with YAML
YAML-based pipelines represent the modern, recommended approach by Microsoft for defining CI/CD in Azure DevOps. Instead of using the graphical interface, the entire workflow is defined in a text file called azure-pipelines.yml.
This approach, known as “Pipeline as Code,” offers several key advantages:
The YAML file is version-controlled, making all changes reviewable and traceable.
Pipelines can be easily transferred between projects or teams.
The entire CI/CD flow, including Build, Test, and Deploy, can be managed in a single file.
Core Concepts in YAML Pipelines
Before writing your first pipeline, there are a few important points to understand:
1. Importance of Indentation
YAML is sensitive to spacing and only supports spaces, not tabs. Extra or missing spaces can cause errors. Using the Azure DevOps editor or the VS Code extension for Azure Pipelines is highly recommended.
2. Basic Pipeline Structure
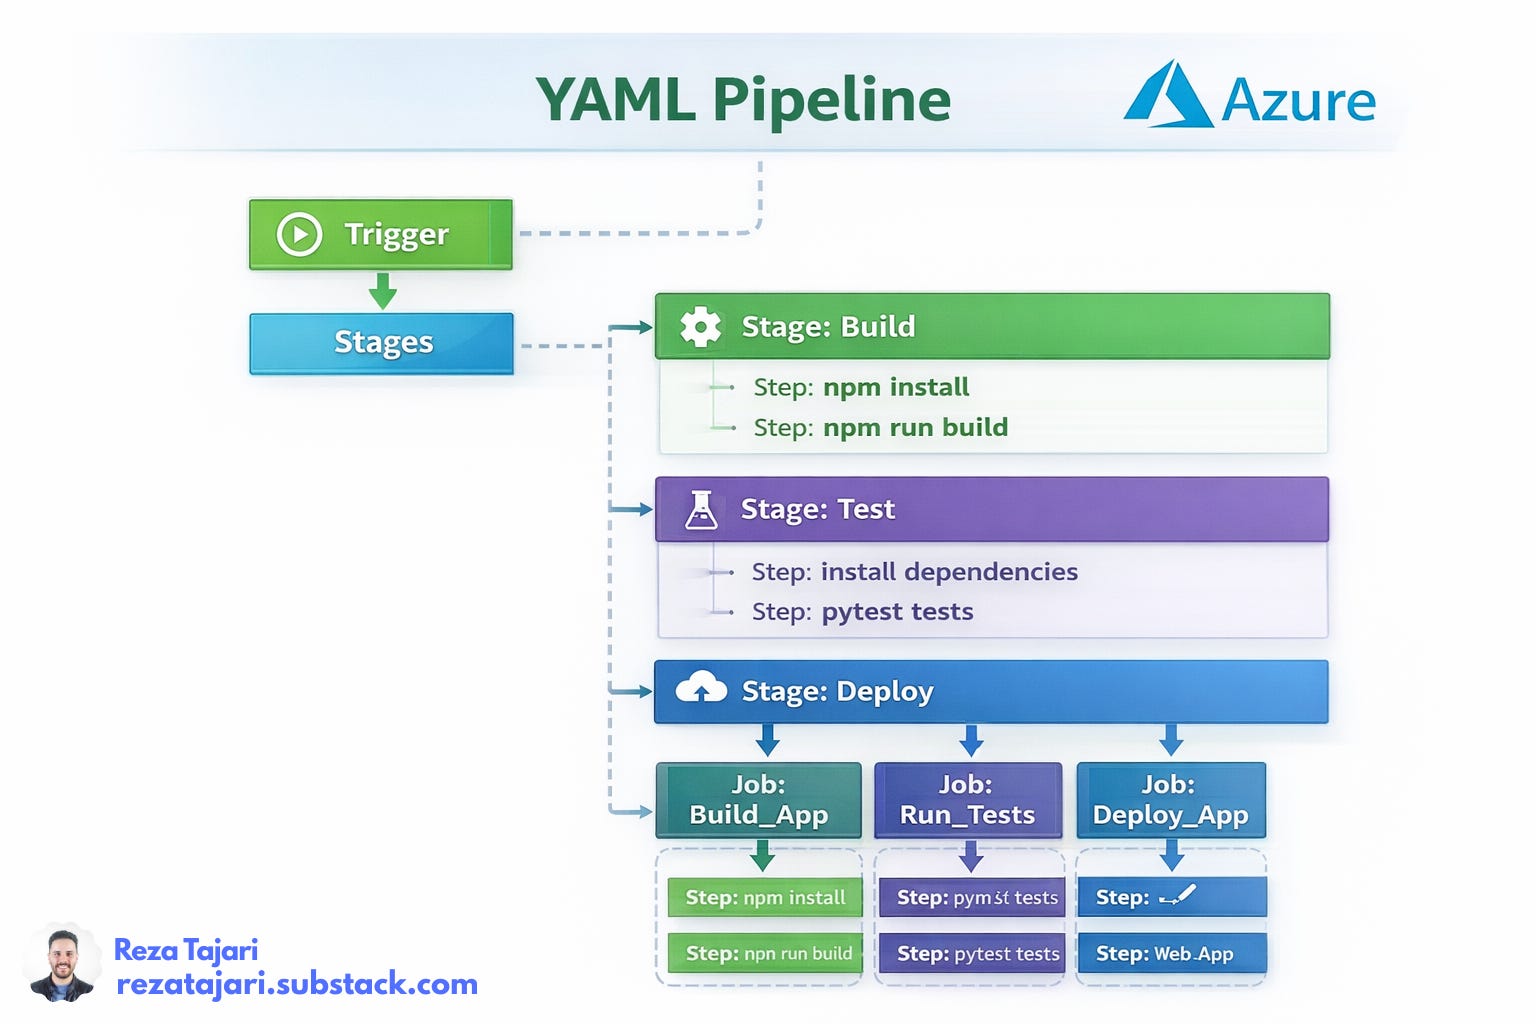
A typical YAML file includes:
Trigger: Specifies when the pipeline should run (e.g., on commits to the main branch).
Jobs or Stages: Define the execution steps of the pipeline.
Steps or Tasks: The actual actions executed inside each job.
3. Support and Validation
The Azure DevOps editor includes a Show Assistant panel for adding ready-made tasks. You can also validate your YAML file before committing using VS Code extensions or the az pipelines validate command.
Pipeline Structure and Stages
In more advanced pipelines:
Each stage can contain multiple jobs.
Stage execution can depend on the success of previous stages.
The trigger defines when the pipeline runs.
Jobs run on agents, and steps/tasks are the actual execution actions.
This model ensures that pipelines remain readable, maintainable, and controllable.
Simple Pipeline Example
Consider a basic pipeline with two stages: Build and Test. The second stage only runs if the first stage succeeds.
The pipeline starts on a commit to the main branch.
Stage Build simulates the project build and prepares artifacts.
The output of the Build stage is stored as an artifact to be used in later stages.
Stage Test runs after a successful Build and publishes the test results.
The pipeline executes on a Microsoft-hosted Ubuntu agent.
In real-world projects, commands such as dotnet build, mvn package, or npm test replace the example scripts, and additional configurations may be added to tailor the pipeline to your project’s needs.
Key Design Principles for YAML Pipelines
Keep your pipeline file version-controlled alongside your source code.
Use variables and templates to avoid repetition and improve readability.
Clearly separate Build, Test, and Deploy stages for clarity and better control.
Use a combination of scripts and built-in Azure DevOps tasks to simplify your pipeline.
Use
dependsOnto manage execution order and conditional logic within your pipeline.
Common Pipeline Errors and Quick Fixes
Even well-designed pipelines may encounter issues in practice. Recognizing common errors and knowing quick solutions can significantly reduce troubleshooting time and prevent long CI/CD delays.
1) YAML Syntax and Indentation Errors
Symptoms: Messages such as bad indentation of a mapping entry or errors related to missing/misplaced colons.
Solution:
Use spaces only; never use tabs.
Maintain the exact nested structure in your file.
For multiline scripts (using
|), ensure inner lines are indented one level deeper than the parent key.Use the Azure Pipelines VS Code extension or the
az pipelines validatecommand before committing to catch errors early.
2) Service Connection Permission Issues
Symptoms: Errors like The service connection does not exist or has not been authorized for use.
Solution:
Navigate to Project Settings → Service Connections, open the connection, and authorize it for pipeline use.
Ensure the Service Connection name in your YAML exactly matches the name defined in Azure DevOps.
3) Misconfigured External Tools
Symptoms: Task failures with errors like 401 or 403, or messages indicating missing tokens/credentials.
Solution:
Define required variables and secrets in Pipeline Variables or Variable Groups, and reference them correctly in tasks.
Verify that the tool’s extension is installed and all required endpoints (e.g., SonarQube server) are properly configured.
4) Agent or Dependency Incompatibility
Symptoms: Errors such as command not found, running the wrong runtime version, or OS-specific failures.
Solution:
Adjust the agent image as needed (e.g.,
ubuntu-latestorwindows-latest).Use installation tasks to set up necessary tools and SDKs (e.g.,
NodeTool,UsePythonVersion, orDotNetCoreCLI).
5) Access and Permission Issues
Symptoms: Pipeline cannot access repositories, environments, or variable groups.
Solution:
Check the pipeline’s permission level and ensure it has access to the required resources.
When needed, explicitly grant access for all pipelines or for specific pipelines.
Troubleshooting Tips
Examine logs carefully: Azure Pipelines logs are detailed and step-specific. Always open failed steps and inspect error messages.
Enable diagnostic mode if necessary for more detailed logging.
Search error messages in official documentation or trusted technical resources—this often provides the fastest route to a tested solution.
Best DevSecOps Practices in Pipelines
Today, security and compliance are no longer treated as a separate step at the end of the development cycle. Instead, they should be integrated from the very beginning of your pipelines. This approach, known as Shift Left Security, helps identify and resolve security issues before code reaches sensitive environments.
1) Early Security Scans
Running security scans during Build and Test stages ensures that vulnerabilities are caught before deployment. This reduces release risk and allows developers to commit changes with greater confidence.
2) Dependency Scanning
Many vulnerabilities stem from external packages and libraries. Tools like npm audit, Trivy, or internal scanners like CodeAnt can analyze project dependencies before deployment, reporting potential security issues early.
3) Automated Security Testing
Integrating SAST (Static Application Security Testing) and DAST (Dynamic Application Security Testing) into your pipeline allows automatic detection of security weaknesses without manual intervention.
4) Comprehensive Logging (Audit Everything)
Azure Pipelines keeps detailed logs for all pipeline executions. These logs serve compliance reporting and security audits, providing a full history of changes and pipeline runs.
5) Least Privilege Access
Restricting the number of people authorized to approve deployments to Production environments minimizes human error and misuse. Even with automated pipelines, controlled human access remains a vital security layer.
Final Thoughts
Pipelines are living systems—they’re not limited to a single execution but grow and evolve alongside your project and development team. Throughout this article, we have explored the creation and management of an Azure DevOps pipeline step by step:
Understanding CI/CD Concepts: We covered the goals of Continuous Integration (CI) and Continuous Delivery (CD), and how they help reduce errors and improve software quality.
Pipeline Types: We compared Classic vs. YAML pipelines, highlighting the flexibility, versioning, and modern advantages of code-based pipelines.
Creating Your First Pipeline: We walked through repository connection, template selection, initial execution, editing, and enabling triggers.
Internal Pipeline Structure: We explored Stages, Jobs, and Tasks and their roles in the CI/CD flow.
Designing and Implementing YAML Pipelines: Key points such as indentation, triggers, stages, steps, dependency management, and parallel job execution were explained.
Common Errors and Quick Fixes: We discussed YAML syntax issues, service connection permissions, agent/dependency conflicts, and misconfigured external tools.
Best DevSecOps Practices: We emphasized security from the start, covering scans, dependency checks, automated testing, logging, and least-privilege access.
Key Benefits of Pipelines:
Reduce human error: Automated Build, Test, and Deploy workflows minimize mistakes and increase confidence in your code.
Faster feedback: Teams can see the results of their changes immediately, identifying problems before deployment.
Continuous security and compliance: Integrating DevSecOps ensures security and regulatory requirements are maintained throughout the CI/CD flow.
Scalability and maintainability: Pipelines as code allow versioning, sharing between teams, and incremental improvements.
Boost development productivity: Automation reduces manual work, letting the team focus on high-value features.
In other words, pipelines are more than just automation tools. They are the rails for secure, fast, and reliable software delivery, and teams should treat them as critical project assets.
Frequently Asked Questions (FAQ)
1) What is an Azure DevOps Pipeline and why do we need it?
A pipeline automates the Build, Test, and Deployment of code, enabling CI/CD. It ensures that code is continuously integrated and delivered with fewer errors to testing and production environments.
2) What is the difference between Classic and YAML Pipelines?
Classic Pipelines: UI-based, drag-and-drop, beginner-friendly, but limited in portability and maintainability.
YAML Pipelines: Code-based, version-controlled, shareable, and ideal for modern, professional projects.
3) How can we quickly fix common pipeline errors?
Common issues include YAML syntax errors, service connection permissions, agent/dependency mismatches, and misconfigured external tools.
To fix them:
Check YAML indentation
Configure pipeline permissions and variables
Analyze logs carefully
4) How do we ensure security and compliance in pipelines?
Implement DevSecOps practices:
Run early security scans
Perform dependency checks
Automate security testing
Maintain comprehensive logs
Restrict access using the principle of least privilege
For more detailed notes every week, subscribe👉 rezatajari.substack.com